Category: Useful

  • Oracle 12c RESTRICTED mode, disabled functionality

    Oracle 12c RESTRICTED mode, disabled functionality

    oracle databaseToday I learned a lot when our production database went in restricted mode. We had huge issues with our Oracle 12c database that was patched unsuccessfully. After the patch did not finish the database always restarted in RESTRICTED MODE, which means only admin / sys can connect to the database. All of our application could not access the database, which resulted in an all around panic situation. The cause was the half finished patch. The database detected that a patch did not finish correctly and because of that it always started restricted.

    The solution was to clear all data from the unsuccessful patch (I don’t know exactly where) and apply the patch again.

    Info about restricted database

    About it on Oracle page – https://docs.oracle.com/database/121/OSTMG/GUID-74FA4067-04D2-477B-A09C-40150BBCD702.html

    Below are some warnings from Oracle page about this special mode. Active sessions are not disconnected when enabling restricted mode. It is a good idea to start the database directly in restricted mode.

    To place an instance in restricted mode, where only users with administrative privileges can access it, use the SQL statement ALTER SYSTEM with the ENABLE RESTRICTED SESSION clause. After placing an instance in restricted mode, you should consider killing all current user sessions before performing any administrative tasks.

    To lift an instance from restricted mode, use ALTER SYSTEM with the DISABLE RESTRICTED SESSION clause.

    Useful commands

    You can check the status of the database with:

    SELECT logins from v$instance; — If “Allowed” , than the database is normally accessible.

    After that you can  enable or disable restricted session with:

    alter system enable restricted session;
    alter system disable restricted session;

    Granting users permission to access the restricted database with:

    grant restricted session to joshua;

    Disabled functionality

    Interesting thing is I could not find any info of what functionality is  disabled when database is in RESTRICTED MODE. I found on my own skin that the following thing do not work:

    • Scheduler (only if explicitly enabled)
    • APEX ( always asked for XDB username and password when accessing apex web page)
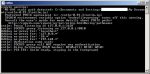
    • DB Links (failing with an awesome error as shown below)  After normal start the DB link was still not functioning. I am not sure if restricted mode disables it.
    DB link error message
    Error message when testing DB link from SQL Developer when the database is in restricted mode


    Hope it helps someone.

    Bye

  • Cntlm gateway mode setup for docker

    Cntlm gateway mode setup for docker

    In CNTLM we need to allow Gateway mode to allow other computers to connect trough our proxy. We used this in our corporate environment to allow docker images to be pulled from the web as docker does not have a nice way to hange proxies with NTLM authentication.

    We changed cntlm.ini around line 70.

    Uncommented Gateway flag

    # Enable to allow access from other computers
    #
    Gateway yes
    

    And for additional security specify specified who is allowed to connect to our proxy.

    # Useful in Gateway mode to allow/restrict certain IPs
    # Specifiy individual IPs or subnets one rule per line.
    #
    Allow 10.10.10.1
    Allow 127.0.0.1
    Allow 10.0.75.0/24
    Deny 0/0
    

    Be careful as docker for windows (not talking about docker toolbox) is not running under localhost, but its running in its own vhost environment. This means that you must specify the proxy in docker as http://10.10.10.1:3128/ and not use localhost or 127.0.0.1.

    Have a nice day.

  • Fingerprint driver for HP Elitebook 8560p Windows 10 64 bit

    I managed to finally set up my fingerprint sensor on HP Elitebook 8560p with Windows 10 64-bit.

    As HP does not provide drivers for Windows 10 for this model (I dont know why that is because it is still a great notebook in 2016), I luckily searched in google and found out that Asus also had the same problem when upgrading to Windows 10.

    Asus was also good enough to provide a driver for that. I found it on http://www.asus.com/Commercial-Notebooks/ASUSPRO_ESSENTIAL_PU551JD/HelpDesk_Download/ and the description of the driver is as follows:

    Synaptics Fingerprint Driver (For Windows 10 Upgrade)
    To avoid Windows login with fingerprints failing due to compatibility issue after upgrade to Windows 10, please un-install ” Fingerprint Driver” and “ASUS Fingerprint driver and utility”. And, update “Synaptics Fingerprint driver” to 4.5.306.0 or above. Then, you can login Windows 10 with new feature “Windows Hello” by fingerprints.

    I installed the driver and manually select it for the device in Device Manage (Like forcing windows to use it because they didn’t recommend it).

    Here is a fast image tutorial.
    1. Install driver
    2. Go to Device manager and manually select from the list

    fingerprint23. Check device installationfingerprint

    4. Go to Windows Hello to set up fingerprints.fignerprint3Hope it helps anyone.

  • Oracle: Update all sequences for tables for current user

    SQL developer 4.1Below is procedure that updates all table sequences to match the max ID currently in a table. Useful when there is a mismatch of values.

    -- Update all sequences to match actual table values
    DECLARE
    v_max VARCHAR2 (1000);
    BEGIN
    
    FOR rec IN (
    select tabs.table_name table_name,
    seqs.sequence_name seq_name,
    seqs.last_number
    from user_tables tabs
    join user_triggers trigs
    on trigs.table_name = tabs.table_name
    join user_dependencies deps
    on deps.name = trigs.trigger_name
    join user_sequences seqs
    on seqs.sequence_name = deps.referenced_name
    where last_number = 1 --only sequnces that have last number 1
    )
    LOOP
    --Info print
    --dbms_output.put_line(rec.table_name);
    --dbms_output.put_line(rec.seq_name);
    --dbms_output.put_line(rec.last_number);
    
    --reset sequence last number to 0
    EXECUTE IMMEDIATE 'ALTER sequence ' || rec.seq_name || ' INCREMENT BY -' || rec.last_number ;
    EXECUTE IMMEDIATE 'SELECT ' || rec.seq_name || '.NEXTVAL FROM DUAL' ;
    
    --Find highest id in table
    EXECUTE IMMEDIATE 'select max(id)+1 from ' || rec.table_name INTO v_max;
    
    --dbms_output.put_line(v_max);
    
    EXECUTE IMMEDIATE 'ALTER sequence ' || rec.seq_name || ' INCREMENT BY ' || v_max ;
    
    EXECUTE IMMEDIATE 'SELECT ' || rec.seq_name || '.NEXTVAL FROM DUAL' ;
    
    EXECUTE IMMEDIATE 'ALTER sequence ' || rec.seq_name || ' INCREMENT BY 1' ;
    
    END LOOP;
    END;
    /
    
  • Visual studio project configuration file settings priority

    csproj in explorerTHE PROBLEM
    For multiple versions (Dev, Test, Prod) of a single ClickOnce application one has to name assemblies differently. In this way you can have all three versions on the same computer. This can be easily achieved by using configuration in Visual Studio. The problem I had was that no matter what the assembly name I specified in the configuration, it would not use it during build.

    SOLUTION
    The problem was hidden on the bottom of the “application.csproj” file. All the properties of each configuration were placed on top of the csproj file and the bottom parameter was always setting like a default value.

     
    .
    .
    .
    <PropertyGroup Condition="'$(Configuration)|$(Platform)' == 'Release|AnyCPU'">
       <OutputPath>bin\Release\</OutputPath>
       <DefineConstants>TRACE</DefineConstants>
       <Optimize>true</Optimize>
       <DebugType>pdbonly</DebugType>
       <PlatformTarget>AnyCPU</PlatformTarget>
       <ErrorReport>prompt</ErrorReport>
       <CodeAnalysisIgnoreBuiltInRules>false</CodeAnalysisIgnoreBuiltInRules>
       <AssemblyName>Application Test</AssemblyName>
       <ProductName>Application Test</ProductName>
       <InstallUrl>https://localhost/install/</InstallUrl>
       <PublishUrl>C:\Deploy\</PublishUrl>
       <UseVSHostingProcess>false</UseVSHostingProcess>
    </PropertyGroup>
    .
    .
    .
    <PropertyGroup>
       <AssemblyName>Application</AssemblyName>
    </PropertyGroup>
    .
    .
    .
    

    Just remove the bottom PropertyGroup and your configuration setting will be applied at build time. Don’t forget to always reload the project when you change the configuration file, as visual studio always reads it only at project load.

    PS: To edit the csproj you must first unload the project. Then you can right click on it and choose edit. (or use a text editor in explorer)

  • Fastest way to create a file list

    Dir helpThe fastest way on Windows to create a file with a list of all files in a directory and its subdirectories  is pretty simple. This should work on most windows desktops. Open the Command Prompt ( Start button -> cmd ) and run the following command.
    The /S switch searches all subdirectories.
    The /B switch ommits all header and other stuff.
    The > forwards all output to the specified filelist.txt file.


    dir /B /S > filelist.txt
    

    * For other switches check the output of

    dir /?

    Tested on a structure composed of 1,5M files. Works flawlessly.